
David is a quilling designer who creates custom pieces for clients around the world. He enjoys pushing the boundaries of traditional quilling and incorporating new materials and techniques into his designs.
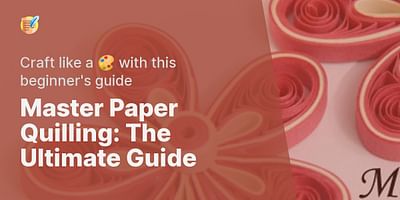
Hey there! If you're looking to dive into the world of 3D quilling and create your very own quilling doll, you've come to the right place! Making a 3D quilling doll is a fun and rewarding project that allows you to unleash your creativity and bring your designs to life. Let's get started!
To make a 3D quilling doll, you'll need a few essential supplies. Here's what you'll need to gather before you begin:
1. Quilling paper strips: These are the foundation of your quilling doll. You can find pre-cut quilling paper strips in various colors and widths at your local craft store or online. Make sure to choose colors that match your desired doll design.
2. Quilling tool: A quilling tool is a must-have for any quilling project. It helps you roll the paper strips into tight coils and shapes. You can find quilling tools in different sizes, but a basic slotted tool is perfect for beginners.
3. Glue: A good adhesive is essential for securing your quilled shapes together. You can use craft glue or specialized quilling glue. Just make sure it dries clear and is suitable for paper crafts.
4. Doll template: Having a doll template or pattern will make your quilling process much easier. You can find free templates online or create your own by sketching out the shape of your doll on a piece of paper.
Now that you have your supplies ready, let's jump into the process of making a 3D quilling doll:
Step 1: Prepare your quilling paper strips
Take your quilling paper strips and cut them into various lengths. These will be used to create different parts of your doll, such as the head, body, arms, and legs. Experiment with different lengths to achieve the desired proportions for your doll.
Step 2: Quill the basic shapes
Using your quilling tool, start rolling the paper strips into tight coils. These coils will serve as the building blocks for your doll. Experiment with different sizes and shapes to create the head, body, and limbs of your doll. You can make larger coils for the body and smaller coils for the head and limbs.
Step 3: Assemble the doll
Once you have quilled all the necessary shapes, it's time to assemble your doll. Start by gluing the coils together, following your doll template or pattern. Use a small amount of glue to secure the coils in place, making sure they are aligned properly.
Step 4: Add details and embellishments
Now comes the fun part! Use additional quilling paper strips to add details and embellishments to your doll. You can create hair, facial features, clothing, and accessories using different quilling techniques. Experiment with different shapes and colors to bring your doll to life.
Step 5: Let it dry and display
Once you're satisfied with your quilling doll, set it aside to dry completely. This may take a few hours or overnight, depending on the type of glue you used. Once dry, your 3D quilling doll is ready to be displayed and admired!
Remember, practice makes perfect. Don't be discouraged if your first attempt doesn't turn out exactly as you envisioned. Quilling is a skill that improves with time and practice. Keep experimenting, trying new techniques, and soon you'll be creating stunning 3D quilling dolls that will impress everyone!
I hope this guide has inspired you to embark on your 3D quilling doll-making journey. Enjoy the process, have fun, and let your creativity soar!


People also asked


Quilling Pattern Articles


All Rights Reserved © 2025