Learn more

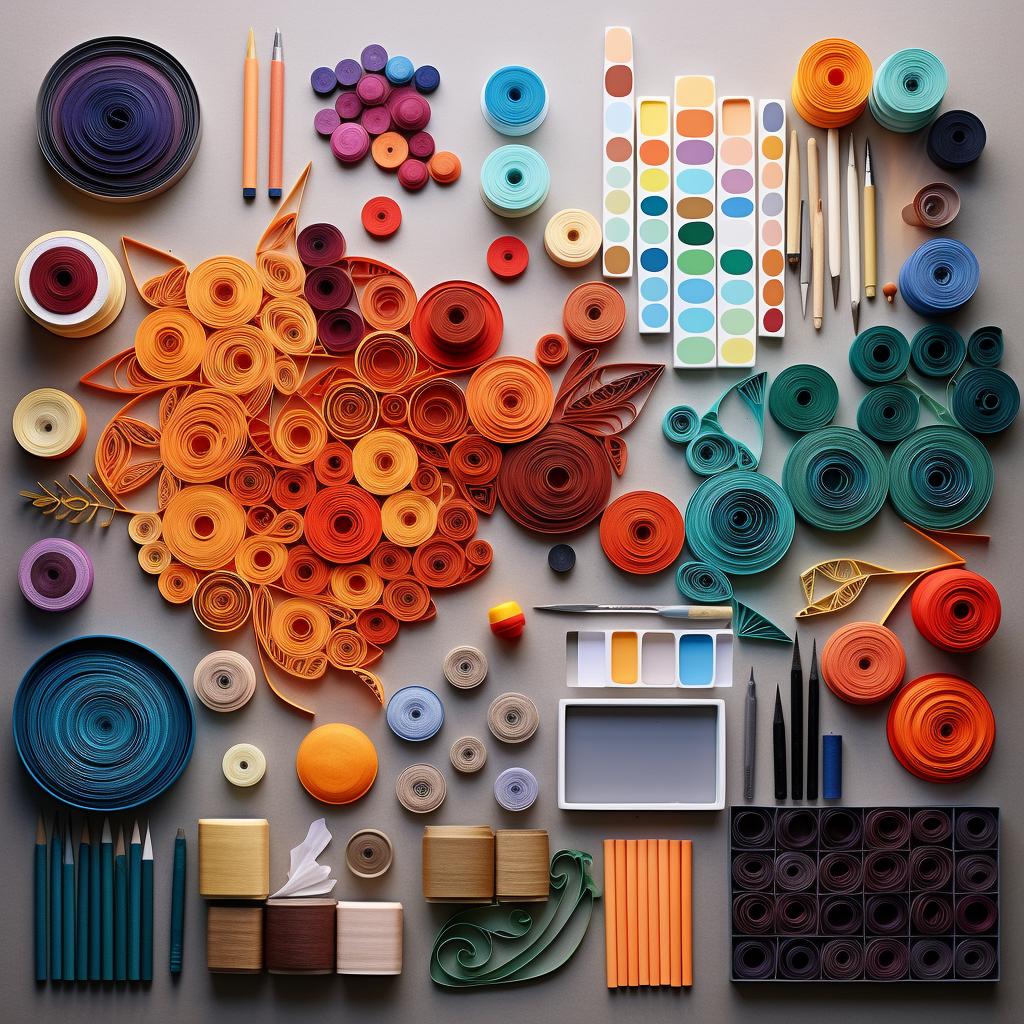

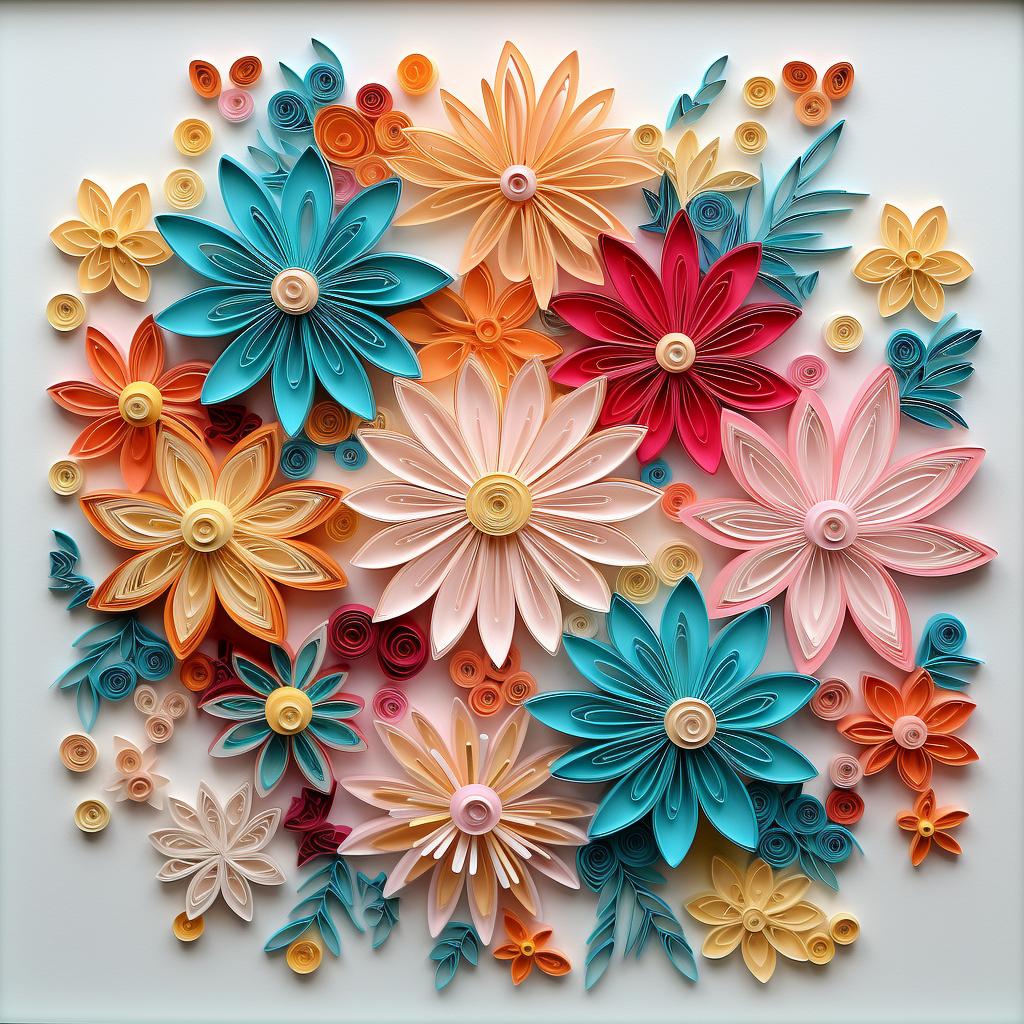
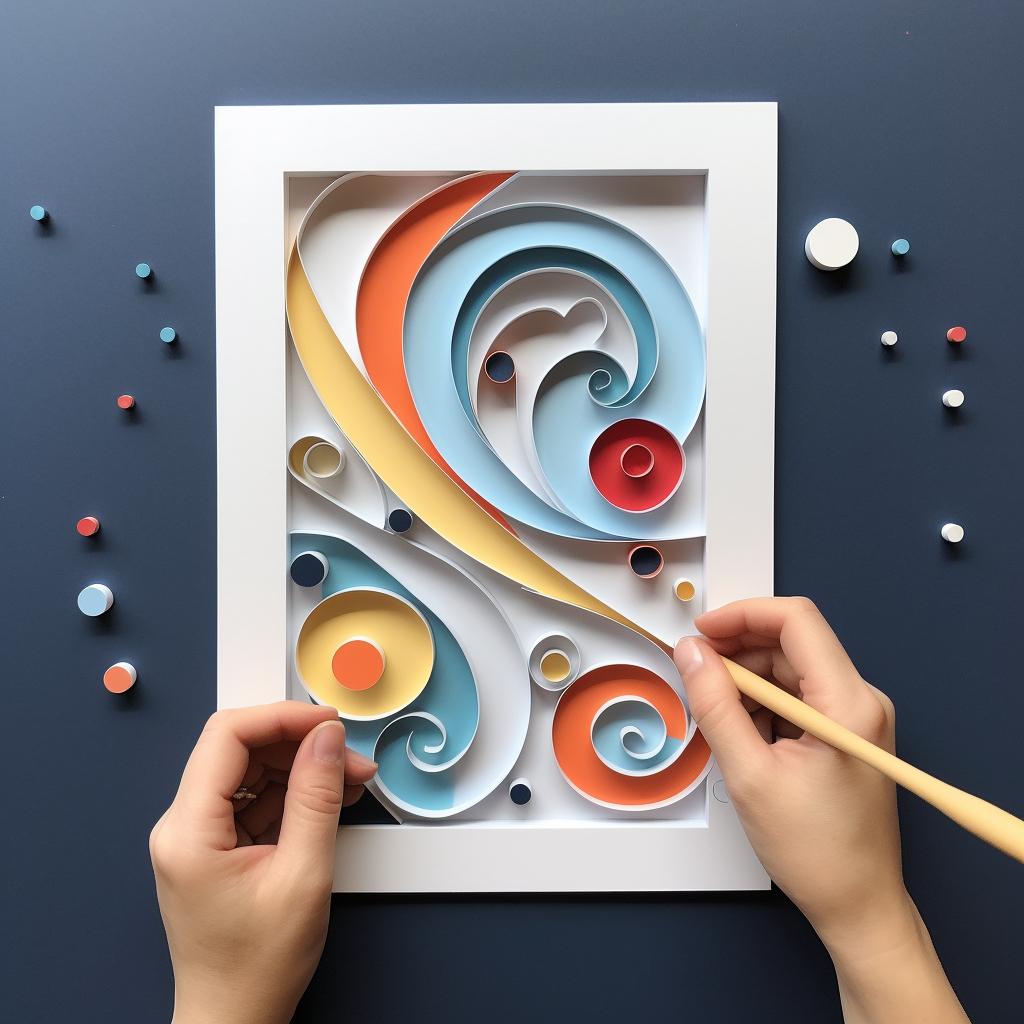

Discover the joy of crafting with our step-by-step guide to creating a quilled photo frame. This guide takes you through the process of transforming simple quilling paper into intricate designs that can adorn a photo frame, making it a unique piece of home decor. Quilling, the art of rolling, shaping, and gluing paper to create beautiful designs, is an easy and rewarding craft to learn. Whether you're new to quilling or a seasoned pro, this guide offers inspiration and instruction to help you create a stunning piece of art.
Quilled photo frames make excellent gifts for loved ones. They are a creative and personalized way to display cherished photos. With the right tools and a bit of patience, you can create a frame that is as unique as the memories it holds. Our guide provides detailed instructions, from gathering your supplies to arranging your design and gluing the quilled shapes. Each step is accompanied by an image, making it easy to follow along.
If you're new to quilling, you might find our Ultimate Beginner's Guide to Mastering the Art of Paper Quilling helpful. This comprehensive guide covers the basics of quilling, including the tools you'll need, how to roll paper, and how to create basic shapes. Once you've mastered these skills, you can apply them to create more complex designs, like those featured in our photo frame guide.
For those looking to expand their quilling skills, we have a variety of quilling patterns available for download. These patterns range from simple shapes to intricate designs and can be used to create a variety of quilled projects, from greeting cards to home decor.
Quilling is a versatile craft that can be used to create a variety of items. If you're looking for more ideas on how to incorporate quilling into your home decor, check out our article on Paper Quilling Home Decor Ideas. This article offers a wealth of inspiration for transforming your space with delightful quilled designs.
So, why not give quilling a try? With our step-by-step guide and a bit of creativity, you can create a beautiful quilled photo frame that you'll be proud to display. Happy quilling!
All Rights Reserved © 2025

